Podder® Prep
Pre-Pod Start Information
We are excited that you have decided on the Omnipod DASH® Insulin Management System. Before you start, here are some things that you need to know.
Tips For A Successful Training Session:
- Be on time – If travelling by car to a hospital allow extra time to find a parking space. The training itself is likely to be 2-3 hours. Plan this in to your diary so that all the necessary information can be given to you.
- Bring someone - Having support at your appointment can be useful, so if you are able, bring a family member or friend with you.
- Be focused – If you have children try and find a babysitter for them while you have your training. If you are bringing a child for training try and find a babysitter for any siblings that they may have. Wherever possible put your phone away so that you are not tempted to check calls and voicemails
- Bring Food – Bring a snack with you in case the training is delayed or prolonged. Some hospitals will encourage you to eat a snack during the training so that you can practice giving a bolus dose of insulin via you PDM.
- Bring your hypo treatment – It is standard practice to always carry some form of glucose to treat a low glucose level
What you need to bring to your Pod start
- Fully charged Omnipod DASH® Personal Diabetes Manager (PDM) using the lithium ion battery, cable and charger provided by Insulet.
- Several new, sealed Omnipod DASH® System Pods*. (your Pods and PDM may be at your hospital in which case they will be given to you at your pump start meeting).
- Vial of rapid-acting U-100 insulin.
- Blood Glucose (BG) meter.
- BG test strips.
- Lancing device and lancets.
- Ketone testing device.
- If possible, set up a Glooko account which will enable you to upload the data from your Omnipod DASH® PDM.
- Coming from a different insulin pump? Please download and complete this form before your pump start meeting and remember to bring it with you.
- Remember to check with your healthcare provider if any adjustments are needed to your insulin doses before your planned training date.
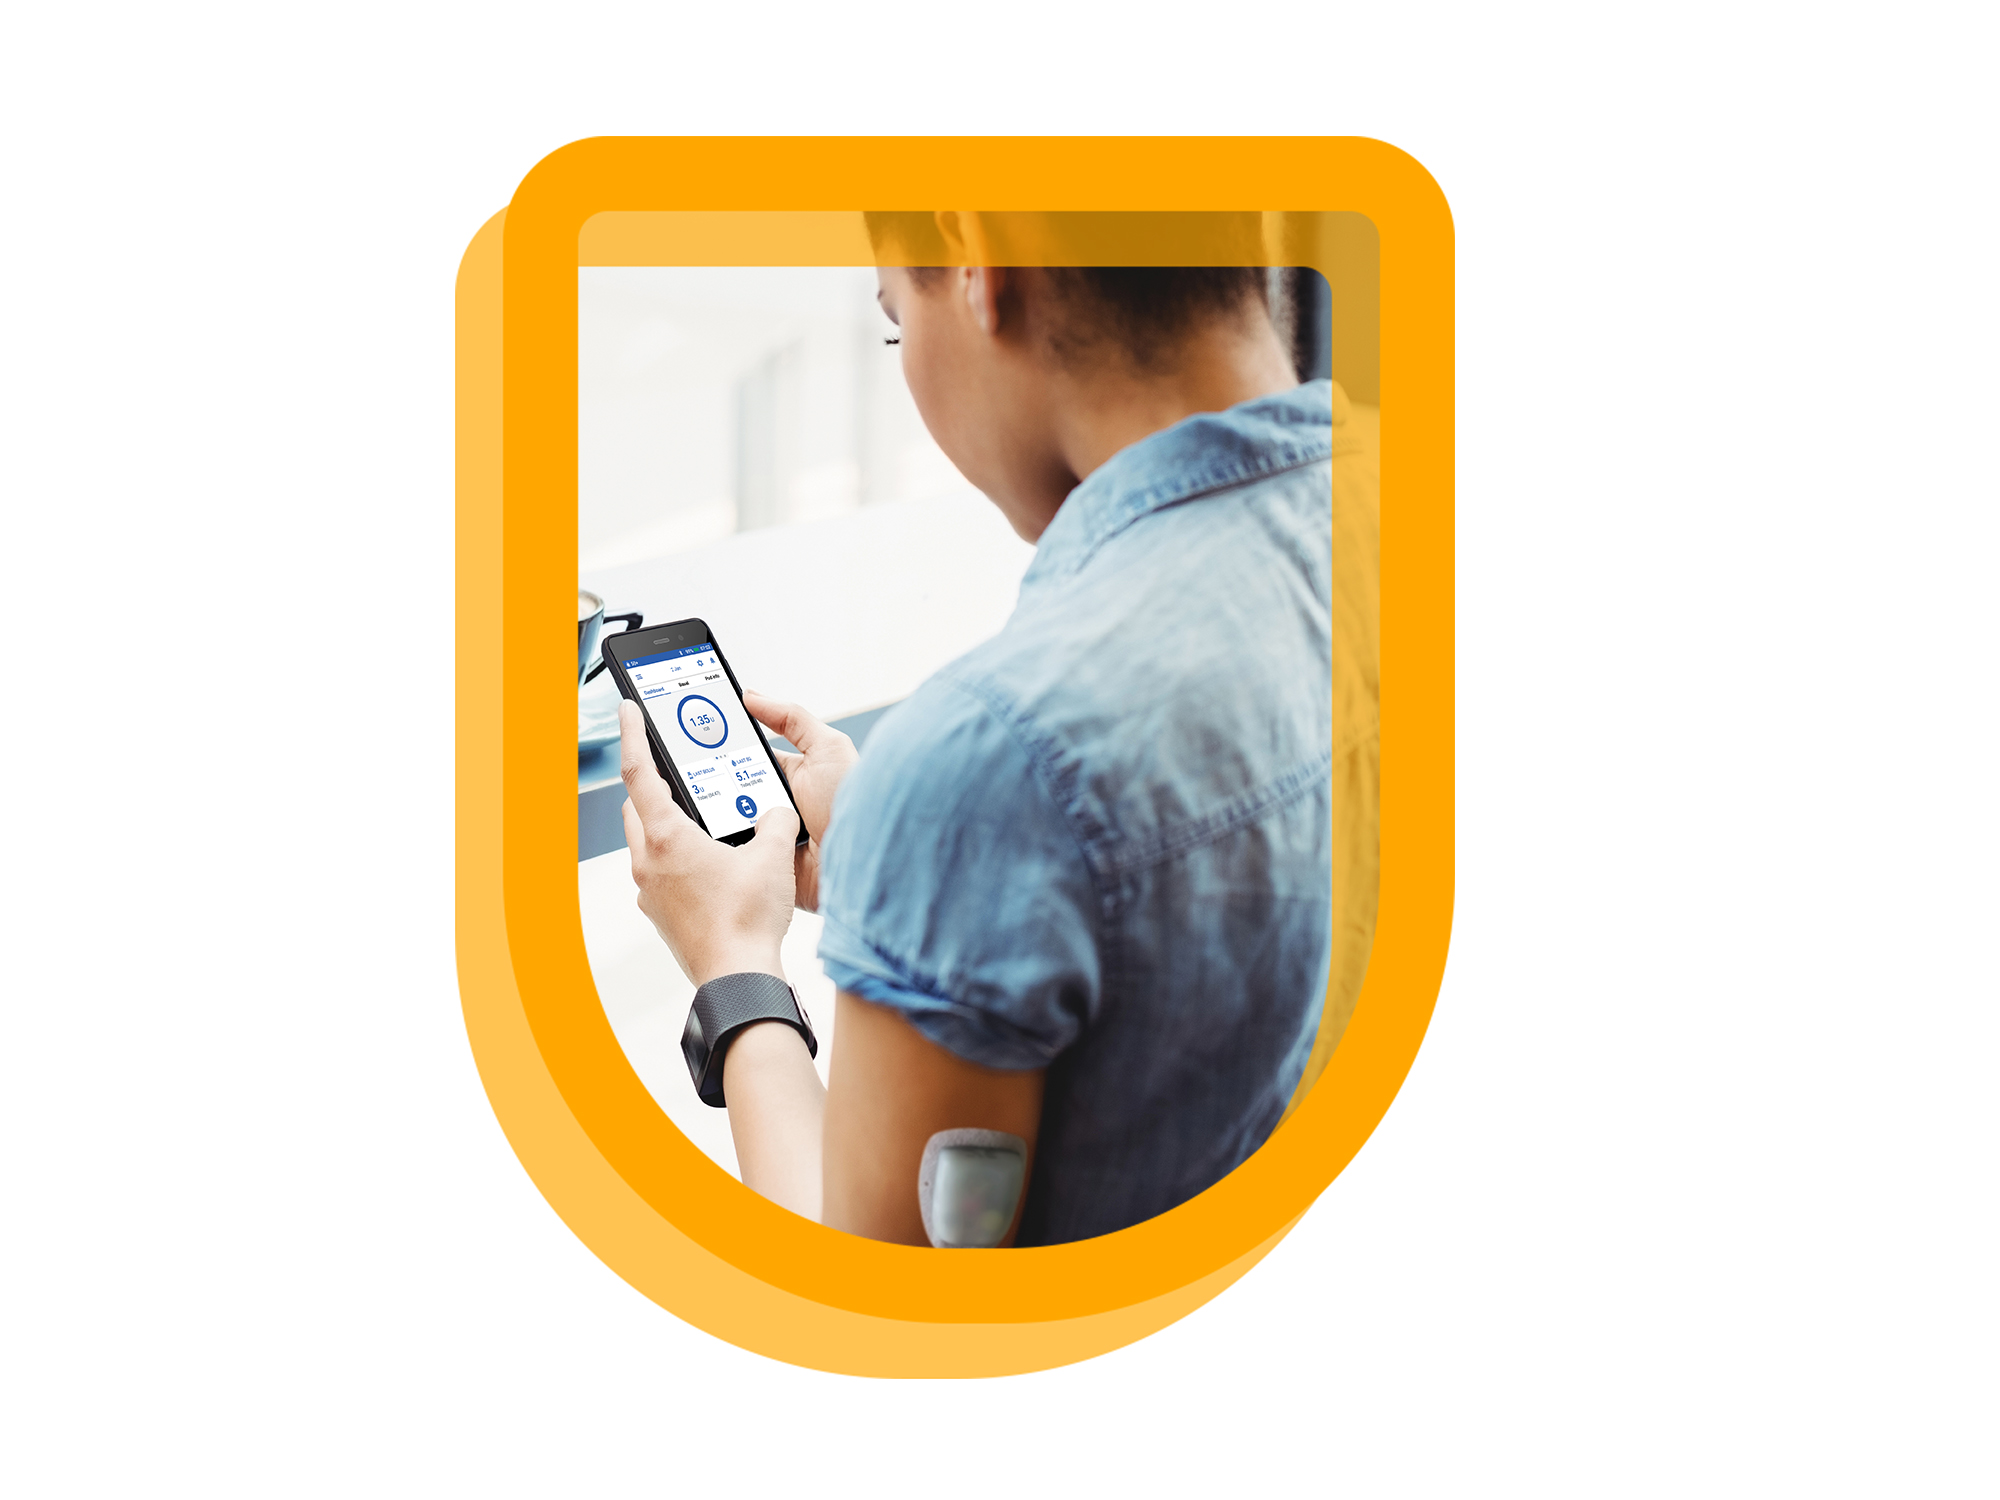
About The Omnipod DASH® System
The Pod
- The Pod is a small, tubeless, wearable and waterproof1 device that you fill with insulin and wear directly on your body.
- The Pod includes a small, flexible cannula that inserts automatically with the tap of a button
- The Pod communicates wirelessly with the Omnipod DASH® PDM to program insulin delivery
The Omnipod DASH® PDM
- You can set a Zero Basal Rate if you require low insulin delivery
- You can set Fractional Insulin to Carb Ratios (0.1g/U) if you are insulin sensitive
- The Pod Site Tracker helps you to track your Pod site locations.
- You can set various presets on the Omnipod DASH® PDM to establish favourites, tag your activities and personalise insulin delivery based on your daily routine
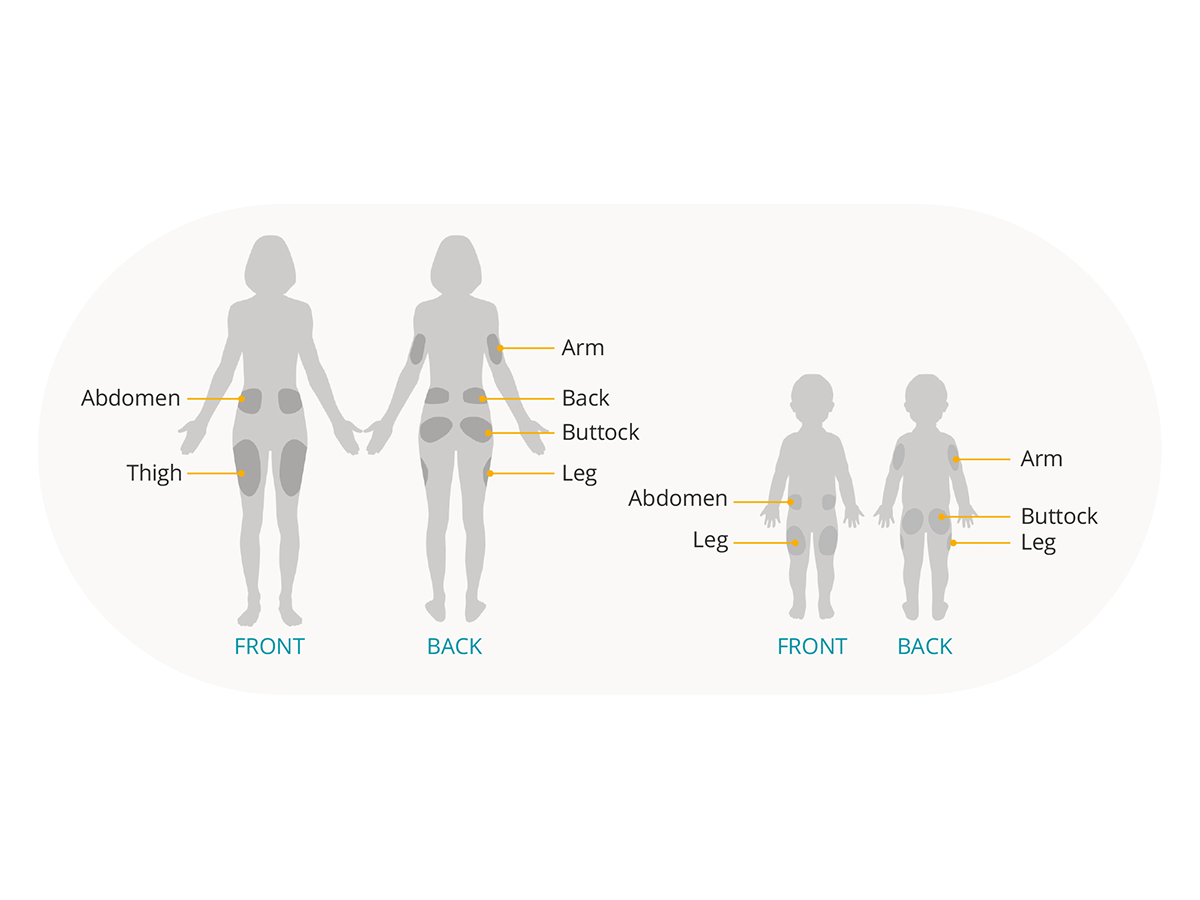
Where to wear your Pod
It's important to choose a new area every time when placing your Pod to avoid site overuse, which could result in variable absorption. The new area should be at least 2.5 cm away from the previous one, 5 cm away from the navel and not over a mole, scar or tattoo, where insulin absorption may be reduced.
How to place your Pod
Arm and leg
Position the Pod vertically or at a slight angle
Back, abdomen or buttocks
Position the Pod horizontally or at a slight angle
Pinching up
This step is important if your Pod location is very lean or doesn't have much fatty tissue. Place your hand over the Pod and make a wide pinch around your skin surrounding the viewing window. Then tap the Start button on the Personal Diabetes Manager. You can let go when the cannula inserts.
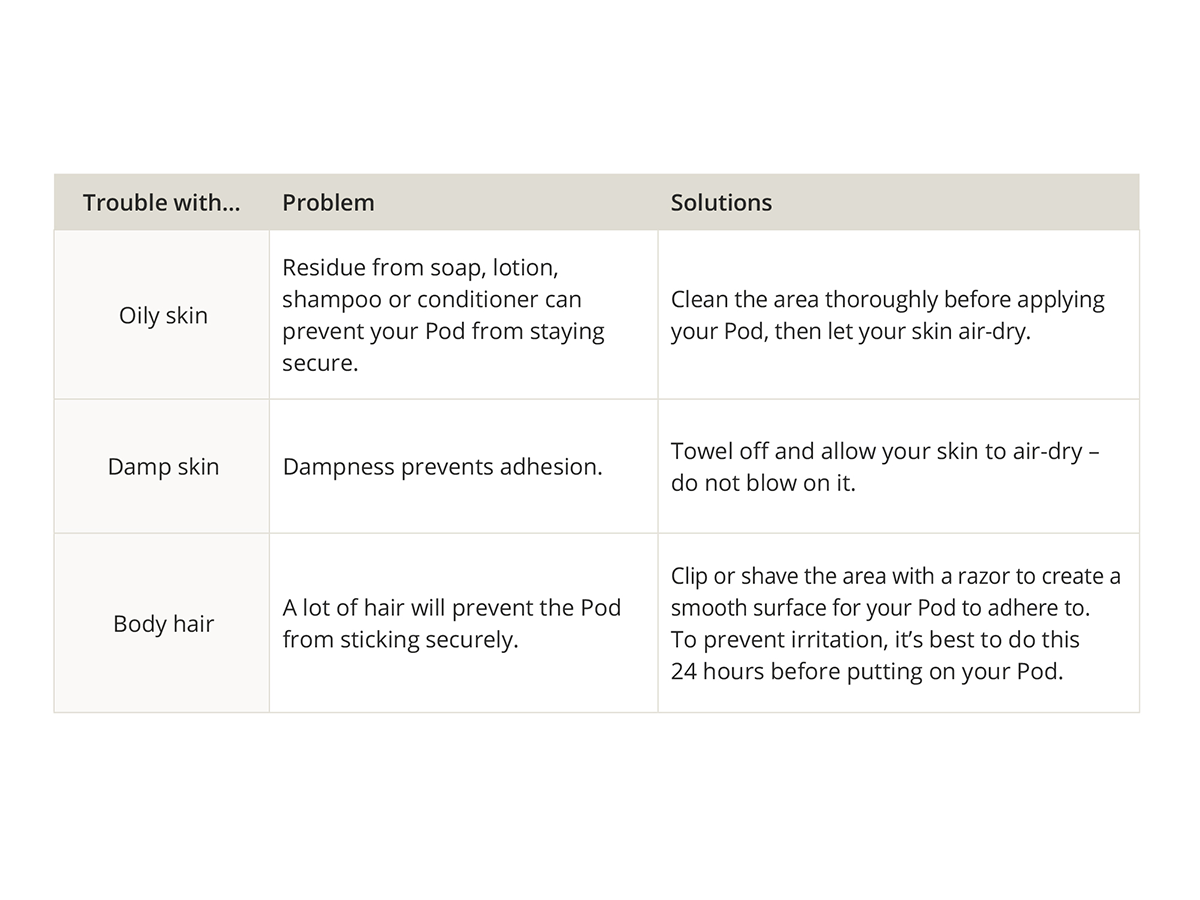
Prepping for your Pod
To help your Pod stick, it helps if you're cool and dry when you apply it. Here are a few other things that could prevent your Pod from effectively sticking, as well as some tips for overcoming them.
You may need to change your Pod:
- When the reservoir is low or empty, or the Pod is nearing expiration or expired
- In response to an alarm
- If the Pod/cannula has become dislodged
- If you have a blood glucose reading of 13.9 mmol/L/250 mg/dL or more and ketones are present
- If you experience unexpected elevated blood glucose levels
- As directed by your healthcare provider
- If during activation the Pod fails to beep
Getting Started on The Omnipod DASH® System
The videos below are for visual information only and you will go through everything with regards to your Omnipod DASH™ System in detail during your training.
Next up...
If you are new to Omnipod, we know that changing therepy can be overwhelming. Here you can find some information to support you in your Omnipod journey.
These modules are not a replacement for medical advice or training. Please always speak to a qualified healthcare professional about your options.