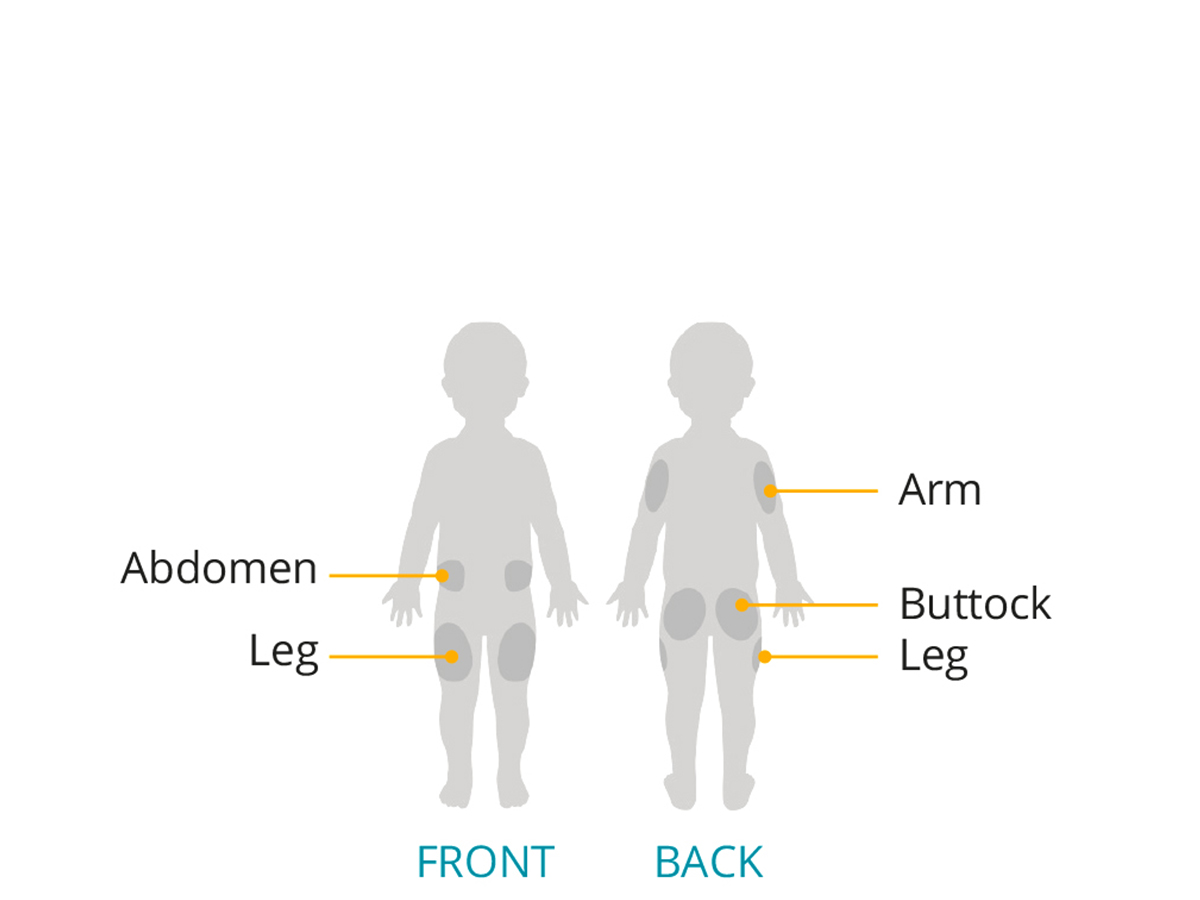
Pod Placement Guide
Wear each Pod with comfort.
The tubeless, on-body Omnipod® Insulin Management System, Omnipod DASH® System and Omnipod® 5 Automated Insulin Delivery System, all give you the freedom to wear each Pod almost anywhere you’d inject insulin!
Worn directly on your skin, affixed with medical grade adhesive, each waterproof† Pod gives you up to 3 days (72 hours) of continuous insulin delivery.
Where to wear your Pod?
You might want to try out a few different places to find what works best for you - just make sure you rotate your sites for optimal insulin absorption.
This is our recommended positioning for each area of the body:
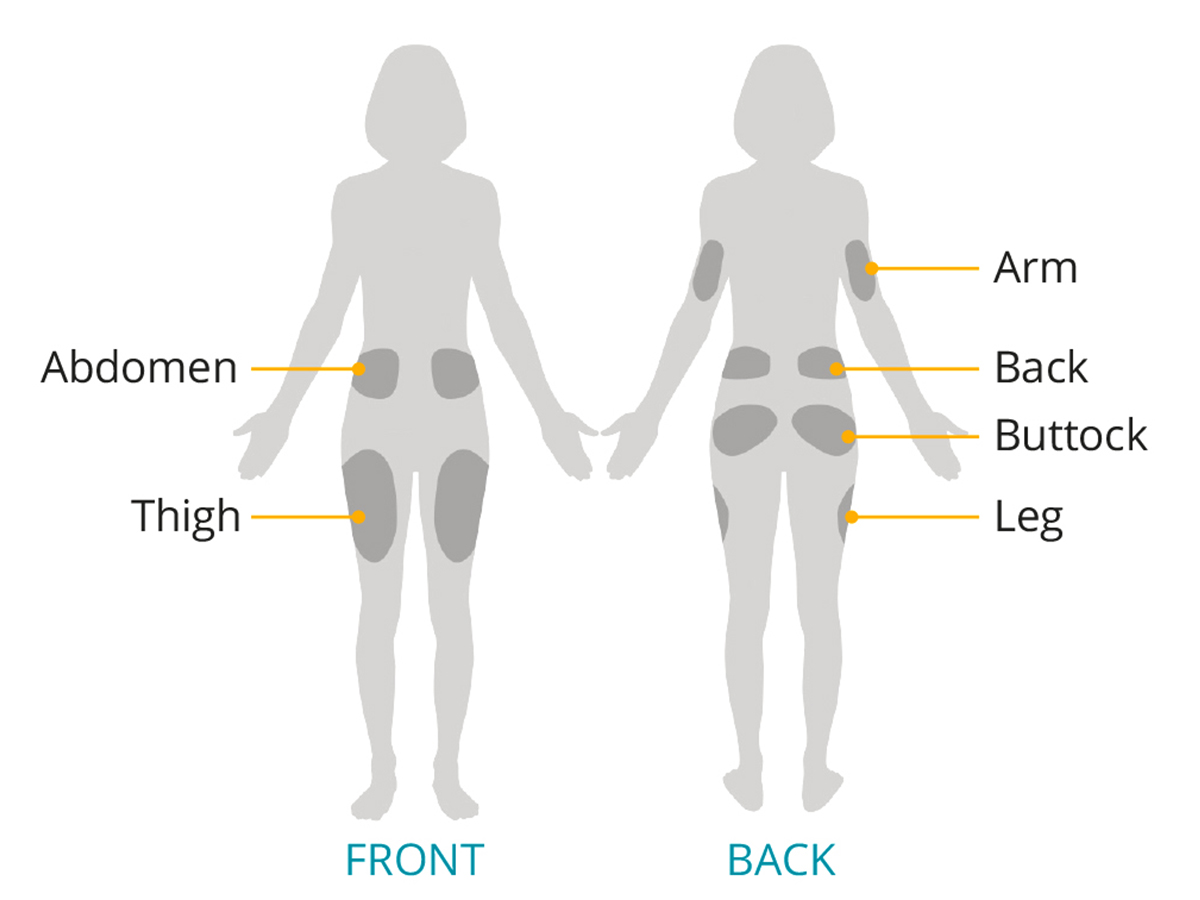
Pod Positioning
- Arm and Leg: Position the pod vertically (up or down is fine), or at a slight angle.
- Back, Abdomen and Buttocks: Position the Pod horizontally (left or right is fine), or at a slight angle.
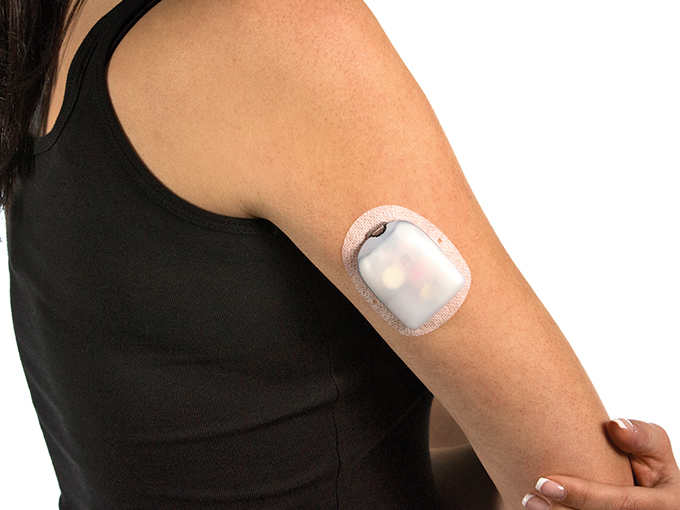
Vertically on your arm – Pod window can be positioned up or down
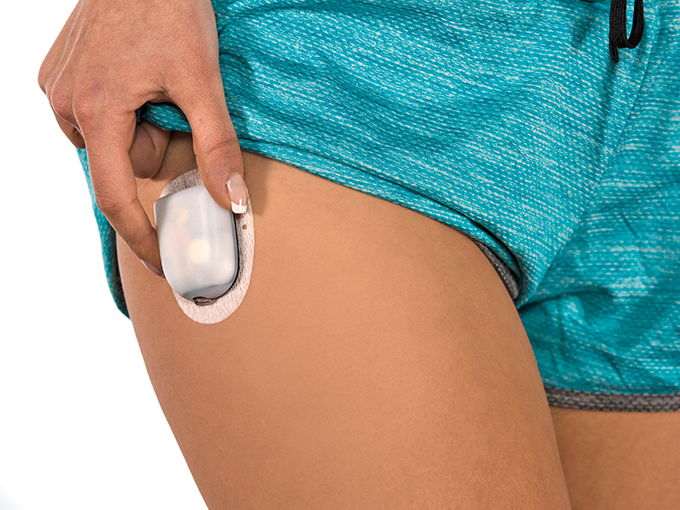
Vertically on your leg
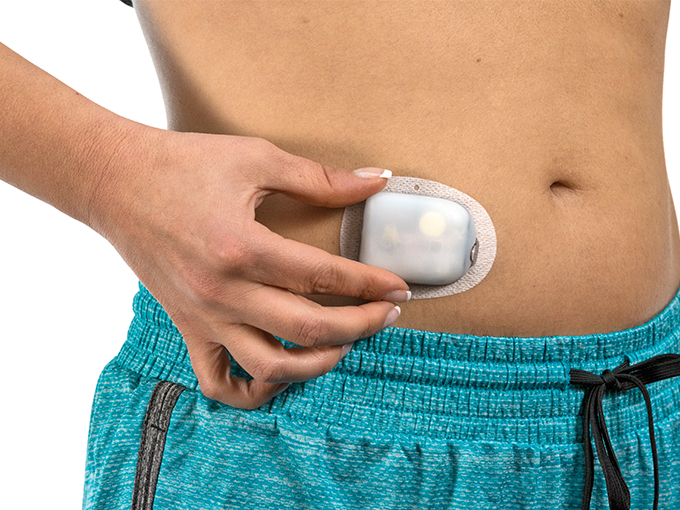
Horizontally on your abdomen – at least 1 inch (2.5cm) away from your waistband and at least 2 inches (5cm) away from your navel for comfort
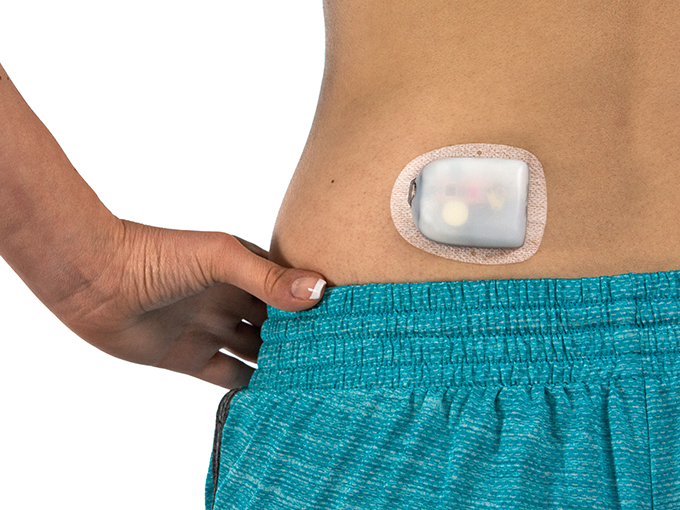
Horizontally on your lower back or upper buttocks
Site selection for best results
It’s a good idea to change the Pod’s location each time you apply a new one, as improper site rotation may reduce insulin absorption.
Make sure the new Pod site is at least one inch (2.5cm) away from the previous one to avoid skin irritation. Omnipod DASH® and Omnipod® 5 have a Pod site tracker to help you remember each Pod site and maintain good site rotation.
Keep it two inches (5cm) away from your belly button and ideally not over a mole, tattoo or scar. Avoid areas with an active infection.
Try to make sure you’re not putting it anywhere uncomfortable, or in a place where you could dislodge it when you sit or move around, such as under folds of skin or directly under your waistband.
Ideal Pod sites have a layer of fatty tissue and should ideally offer easy access and viewing.
Watch out for where you wear belts, handbags and backpacks too!
As you try Pods in different places, you’ll learn which sites feel comfortable and convenient for you.
Wearing the Pod with other devices
You may wear your Pod in addition to another diabetes device like a flash glucose sensor (FGS) or a continuous glucose monitor (CGM).
For The Omnipod® 5 Automated Insulin Delivery System, you’ll also need to wear a Dexcom G6 CGM Sensor for when the system is in automated mode.
Place the Pod at least 3 inches (7.5cm) from your Sensor site.
For Omnipod 5, The Pod and Sensor should be worn in ‘line of sight’, which means worn on the same side of the body in a way that the two devices can “see” one another without your body blocking their communication.
Preparing the Pod
Make sure the site is clean and dry (see the tips section below for more on this). After removing the white paper backing from the Pod’s adhesive, press the Pod down firmly to the selected site to secure it to your skin.
The adhesive is designed for one-time use, and once a Pod is placed on your body you cannot move that Pod to another site.
Pinching Up
If the insertion site is very lean or doesn’t have much fatty tissue, it might help to pinch the skin where the cannula will be inserted.
To do this, place your hand over the Pod after you’ve pressed it down but before insertion, and make a wide pinch around the skin surrounding the viewing window. Press the start button on the PDM and release the skin after the cannula has been inserted.

Hear what our Podders® have to say:
“I have the freedom to wear whatever I want, because you can discreetly hide the Pod so nobody can really see it”
Jule K, Omnipod® Ambassador & Podder® Since 2019
Can you spot the Pod?
Wear your Pod with confidence
The tubeless, waterproof† Omnipod® Pod gives you the freedom to do the things you love - like swimming, dancing, playing active sports or heading out for the night! The Pod’s adhesive keeps it securely in place for up to 3 days (72 hours)*.
Pod Adhesion Tips and Resources
In general it’s best to avoid getting body lotion, creams or oils near the Pod site, as these products may loosen the adhesive.
Try to make sure you’re cool and dry (i.e. not perspiring) when you’re changing the Pod.
To improve adhesion, use an alcohol wipe to clean an area about the size of a tennis ball where you plan to place the new Pod and let it air dry completely before applying the Pod. We do not recommend blowing it dry.
If possible, avoid getting the Pod wet for at least 2 hours after applying it. So don’t take a bath, shower or swim with a brand new Pod.
There are products available to enhance adhesion if needed - ask your Healthcare professional (HCP) for more information.
The Dexcom G6 sensor and transmitter are water-resistant and may be submerged under 2.4 meters (8 feet) of water for up to 24 hours without failure when properly installed.
*Up to 72 hours of insulin delivery.
Troubleshooting
Issue: Oily Skin
Issue: Damp Skin
Issue: Body Hair
One of our Omnipod® Ambassadors, David, show us how he changes his Pod!
Frequently Asked Questions about where to wear a Pod
Can I wear a Pod on the arm?
How to preapare the skin to wear the Pod?
Should I always wear the Pod in the same area?